tuto : http://www.never-utopia.com/t41244-mise-en-forme-complete-du-profil-upside-down-css
Pour modifier le profil sur vos forum vous devez aller dans le template "viewtopic_body", autrement nommé "Affichage d'un sujet". Dans ce template, repérez le code suivant :
- Code:
-
<td class="{postrow.displayed.ROW_CLASS}"{postrow.displayed.THANK_BGCOLOR} valign="top" width="150">
<span class="name"><a name="{postrow.displayed.U_POST_ID}"></a><strong>{postrow.displayed.POSTER_NAME}</strong></span><br />
<span class="postdetails poster-profile">
{postrow.displayed.POSTER_RANK}<br />
{postrow.displayed.RANK_IMAGE}{postrow.displayed.POSTER_AVATAR}<br /><br />
<!-- BEGIN profile_field -->
{postrow.displayed.profile_field.LABEL} {postrow.displayed.profile_field.CONTENT}{postrow.displayed.profile_field.SEPARATOR}
<!-- END profile_field -->
{postrow.displayed.POSTER_RPG}
</span><br />
<img src="http://2img.net/i/fa/empty.gif" alt="" style="width:150px;height:1px" />
</td>
Il commence à la ligne 87 normalement. C'est la case du profil ("td" en codage html désignant la case d'un tableau).
Remplacez l'intégralité de ce passage par celui-ci :
- Code:
-
<td class="{postrow.displayed.ROW_CLASS}"{postrow.displayed.THANK_BGCOLOR} valign="top" width="150">
<div class="profil_mess">
<span class="name"><a name="{postrow.displayed.U_POST_ID}"></a><strong>{postrow.displayed.POSTER_NAME}</strong></span><br />
<span class="postdetails poster-profile">
{postrow.displayed.POSTER_RANK}<br />
{postrow.displayed.RANK_IMAGE}</span>
<span class="avatar_mess">{postrow.displayed.POSTER_AVATAR}</span><br />
</div>
<div class="profil2_mess">
<center><img src="http://img15.hostingpics.net/pics/665019profilimage.png" /></center>
<div class="profil2_content"><span class="postdetails poster-profile">
<!-- BEGIN profile_field -->
{postrow.displayed.profile_field.LABEL} {postrow.displayed.profile_field.CONTENT}{postrow.displayed.profile_field.SEPARATOR}
<!-- END profile_field -->
{postrow.displayed.POSTER_RPG}
</span><br />
<img src="http://2img.net/i/fa/empty.gif" alt="" style="width:150px;height:1px" /></div>
</div>
</td>
N'oubliez pas d'enregistrer et de valider votre template modifié !
Installation CSS
Allez ensuite dans votre Feuille CSS pour y ajouter ce code, qui mettra en forme votre profil :
- Code:
-
.profil_mess
{
position: relative;
z-index: 9;
width: 210px;
margin-left: auto;
margin-right: auto;
margin-top: 10px;
background-color: #333333;
padding: 4px;
text-align: center;
border-radius: 10px;
-moz-border-radius: 10px;
-htm-border-radius: 10px;
-o-border-radius: 10px;
-webkit-border-radius: 10px;
border: 2px solid #5b5b5b;
box-shadow: 0px 0px 5px #000000;
-moz-box-shadow: 0px 0px 5px #000000;
-htm-box-shadow: 0px 0px 5px #000000;
-o-box-shadow: 0px 0px 5px #000000;
-webkit-box-shadow: 0px 0px 5px #000000;
}
.name
{
display: block;
text-transform: uppercase;
margin-top: -15px;
margin-bottom: -10px;
font-size: 14px;
font-family: arial black;
text-shadow: 1px 1px 0px #000000;
padding-bottom: 5px;
border-bottom: 1px dashed #5b5b5b;
}
.avatar_mess
{
display: block;
width: 200px;
margin-left: auto;
margin-right: auto;
margin-top: 10px;
height: 320px;
overflow: hidden;
border: 5px solid #0d0d0d;
opacity: 0.7;
-moz-opacity: 0.7;
-khtml-opacity: 0.7;
filter: alpha(opacity=70);
transition: 1s;
-moz-transition: 1s;
-o-transition: 1s;
-htm-transition: 1s;
-webkit-transition: 1s;
}
.avatar_mess:hover
{
opacity: 1;
-moz-opacity: 1;
-khtml-opacity: 1;
filter: alpha(opacity=100);
transition: 1s;
-moz-transition: 1s;
-o-transition: 1s;
-htm-transition: 1s;
-webkit-transition: 1s;
}
.profil2_mess
{
position: relative;
z-index: 1;
width: 180px;
margin-left: auto;
margin-right: auto;
margin-top: -202px;
background-color: #141414;
padding-left: 4px;
padding-right: 4px;
text-align: left;
border-radius: 10px;
-moz-border-radius: 10px;
-htm-border-radius: 10px;
-o-border-radius: 10px;
-webkit-border-radius: 10px;
border: 2px solid #434343;
box-shadow: 0px 0px 5px #000000;
-moz-box-shadow: 0px 0px 5px #000000;
-htm-box-shadow: 0px 0px 5px #000000;
-o-box-shadow: 0px 0px 5px #000000;
-webkit-box-shadow: 0px 0px 5px #000000;
color: #434343 !important;
transform: rotate(-180deg);
-moz-transform: rotate(-180deg);
-o-transform: rotate(-180deg);
-htm-transform: rotate(-180deg);
-webkit-transform: rotate(-180deg);
transition: 2s;
-moz-transition: 2s;
-o-transition: 2s;
-htm-transition: 2s;
-webkit-transition: 2s;
}
.profil2_mess:hover
{
margin-top: -42px;
transform: rotate(0deg);
-moz-transform: rotate(0deg);
-o-transform: rotate(0deg);
-htm-transform: rotate(0deg);
-webkit-transform: rotate(0deg);
transition: 2s;
-moz-transition: 2s;
-o-transition: 2s;
-htm-transition: 2s;
-webkit-transition: 2s;
}
.profil2_content
{
display: block;
width: 180px;
height: 200px;
max-height: 200px;
overflow: auto;
}
Personnalisation
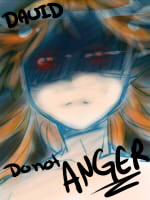
Comme vous pouvez le constater, le profil est placé à l'envers sous l'avatar pour ensuite être remis dans le bon sens au survol. Du coup, il est OBLIGATOIRE que votre petite image de profil soit créée A L'ENVERS ! Bah oui, puisqu'elle n'apparait à l'endroit que parce que le bloc est à l'envers... Vous suivez ? XD
Pour le reste, il s'agit essentiellement de couleurs à changer, guère plus.
Parmi les effets du profil, l'avatar est en opacité légèrement réduite et devient opaque au survol, et le pseudo est en majuscules.


 = Ce smiley est trop fucking nice. BON èé